Kataifi Recipe: How to Make the Pastry and a Classic Greek-Style Nut Dessert
A good kataifi recipe starts with one important decision: are you making the delicate pastry strands yourself, or are you using prepared kataifi dough?
For most home bakers, frozen pastry is the easier and more reliable option. Making the strands from scratch is possible, but it requires patience and careful control of batter consistency and heat. The finished dessert, however, is much more straightforward: loosen the strands, coat them thoroughly with butter, wrap them around a nut filling, bake until deeply golden, and finish with syrup.
This guide covers both stages so you can choose the method that suits you. The dessert below follows the structure of a classic Greek-style nut-filled preparation, while the homemade dough section explains the technique rather than pretending there is one universally fixed flour-to-starch formula.
Before You Start: Homemade Dough or Prepared Pastry?
The easiest way to avoid unnecessary frustration is to separate the two tasks.
Making the strands: You create a thin batter and form it into threads on a heated surface.
Making the dessert: You use prepared or homemade strands, add butter and filling, shape them, bake them, and finish them with syrup.
Commercial pastry is particularly useful for beginners because the hardest part of strand production has already been done.
| Option | Main advantage | Main challenge | Best for |
| Homemade strands | Full control and traditional technique | Requires practice | Experienced or curious bakers |
| Frozen prepared pastry | Convenient and consistent | Needs careful thawing and handling | Most home cooks |
| Fresh prepared pastry | Easy to work with | Less widely available | Cooks near specialist stores |
If this is your first time making the dessert, prepared pastry is the sensible starting point.
Homemade Kataifi Dough
The raw pastry is not made like bread or pie dough.
Instead, you need a thin, pourable batter that can pass through a very small opening and form continuous threads on a heated surface.
Ingredients for a Small Test Batch
Because homemade formulas vary, it is better to start with a small batch while learning the technique.
- 200 g all-purpose flour
- 30-50 g cornstarch
- 320-400 ml water, added gradually
- 2 teaspoons neutral oil
- ¼ teaspoon salt
- A small amount of neutral oil for the cooking surface
The amount of water is deliberately given as a range. Flour absorbs differently, and the correct batter should be judged by consistency rather than by a rigid number.
Mix the Batter
Sift the flour, cornstarch, and salt into a bowl.
Gradually whisk in the water. Add the oil and continue whisking until the batter is smooth.
Pass the mixture through a fine sieve if necessary.
The target consistency is very thin and fluid, closer to a thin crepe batter than conventional dough.
If the batter runs too slowly from your dispenser, it is probably too thick. If it produces broken droplets instead of continuous threads, adjust the consistency gradually and test again.
Cook the Strands
Use a clean nonstick skillet or flat cooking surface over low to medium-low heat.
Transfer the batter to a squeeze bottle or another fine dispenser.
Then:
- Lightly grease the cooking surface if necessary.
- Pipe very thin lines across the heated surface.
- Keep the strands close enough to form a loose sheet.
- Allow them to set without significant browning.
- Lift them carefully once they release.
- Place them under a slightly damp towel.
- Repeat with the remaining batter.
The strands should remain relatively pale at this stage. Their deep golden color and crisp texture develop later during preparation of the finished dessert.
Why a Test Strand Matters
Do not make the entire batch before checking the first few strands.
If they are too thick, adjust the dispenser or batter.
If they brown immediately, reduce the heat.
If they break before setting, examine the batter consistency.
If they stick badly, check the cooking surface and temperature.
A five-second test can prevent an entire batch from becoming unusable.
Classic Greek-Style Nut Kataifi
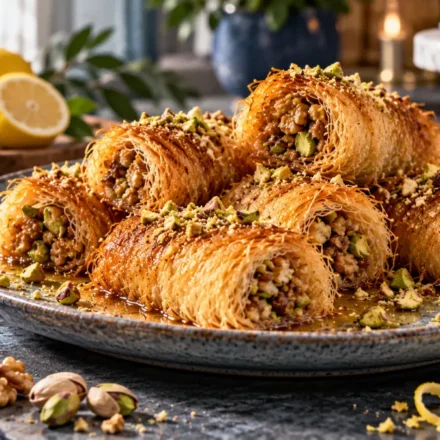
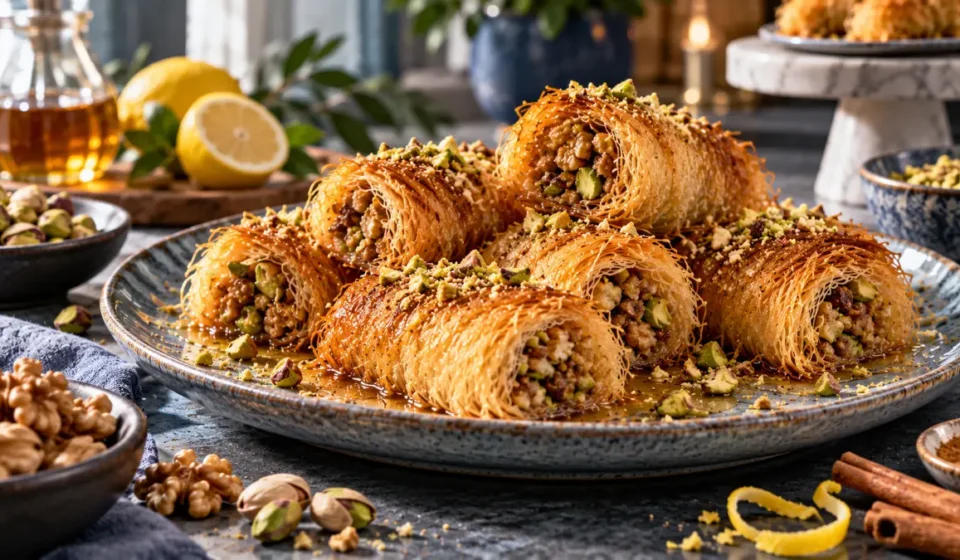
For a reliable home dessert, prepared frozen pastry is considerably easier than making the strands yourself.
The quantities below produce a generous tray of rolled pastries and follow the proportions of established Greek-style recipes while allowing for normal variation between ovens and pastry brands. A published Greek recipe, for example, uses 450 g kataifi dough, 250 g walnuts, 250 g butter, and a syrup made from 450 g sugar and 330 g water.
Ingredients
For the pastry
- 450 g prepared kataifi pastry
- 250 g unsalted butter, melted
For the filling
- 250 g walnuts, roughly chopped
- 1 teaspoon ground cinnamon
- A pinch of ground clove
You can replace part of the walnuts with pistachios or almonds if preferred.
For the syrup
- 450 g sugar
- 330 ml water
- Peel of 1 lemon
- 1 cinnamon stick
Optional additions such as a small amount of orange blossom water can be used in some versions, but the basic lemon-cinnamon syrup keeps the flavor focused.
Prepare the Syrup First
Place the sugar, water, lemon peel, and cinnamon stick in a saucepan.
Bring the mixture to a boil and stir or simmer only until the sugar has dissolved.
Remove it from the heat and allow it to cool completely.
This order is useful because the pastry will be hot when it leaves the oven. A classic Greek method uses cold syrup over hot pastry, allowing the syrup to soak into the freshly baked strands.
The precise syrup temperature is not universal across every regional dessert, so this instruction applies to this particular Greek-style preparation rather than every dish made from thread pastry.
Prepare the Nut Filling
Roughly chop the walnuts.
Do not turn them into a fine paste.
Small pieces provide a better contrast with the crisp pastry and are easier to distribute evenly.
Mix the walnuts with cinnamon and a pinch of ground clove.
You can add pistachios or almonds, but walnuts provide the classic profile for this particular style.
Thaw and Loosen the Pastry
If using frozen pastry, thaw it according to the manufacturer’s instructions.
A number of Greek recipes recommend slow refrigerator thawing rather than leaving the pastry exposed at room temperature for an extended period. My Greek Dish specifically recommends overnight refrigerator thawing for its preparation.
Once workable, open the package and gently separate the strands with your fingers.
Do not aggressively pull apart dry clumps.
Keep the unused pastry covered with a slightly damp towel while working. Fine strands lose moisture rapidly when exposed to air.
Butter the Strands
This is one of the most important steps.
Take a manageable portion of pastry and gently spread the strands apart.
Drizzle melted butter over the strands and work it through carefully with your fingers.
You want the butter distributed throughout the pastry rather than concentrated on the outside.
Do not mash the strands into a dense ball.
A loose structure gives the finished pastry more opportunities to brown and crisp.
Shape the Rolls
Take a portion of buttered pastry and spread it into a narrow rectangle.
Place about a teaspoon of nut filling near one end.
Fold the sides inward slightly, then roll the pastry into a compact cylinder.
Place the roll seam-side down in a buttered baking dish.
Continue until the dish is filled.
Arrange the rolls relatively close together so they support one another during baking, but avoid compressing them so aggressively that the strands lose their texture.
Published Greek recipes use this snug arrangement for rolled kataifi and finish the rolls with additional butter before baking.
Bake Until Deeply Golden
Preheat the oven to approximately 170-180°C (340-350°F).
Bake the rolls until the pastry is thoroughly browned and crisp.
Do not rely on “30 minutes” as a universal finish time. A published Greek preparation using 450 g of pastry bakes at 170-180°C for approximately one hour.
Your oven, dish, roll size, and pastry moisture can change the timing.
The better indicators are:
- Deep golden-brown strands
- Crisp exposed pastry
- No obviously pale or wet-looking areas
- Even browning across the dish
If the top becomes dark while the lower pastry remains pale, the pastry needs more even heat rather than simply more time at the same temperature.
Add the Cold Syrup
Remove the hot pastry from the oven.
Using a ladle, distribute the cooled syrup slowly across the rolls.
Do not dump it into one location.
A published Greek method pours about three-quarters of the syrup first, allows it to absorb, and then adds the remainder.
You can follow that approach for better control.
The finished dessert should be richly moistened but should not sit in an excessive pool of syrup.
Let the Dessert Rest
Freshly baked kataifi is tempting to eat immediately, but resting improves the final texture.
Give the pastry several hours to absorb and redistribute the syrup.
The center becomes more cohesive while browned exterior strands retain some of their crispness.
Serving too soon can make the texture seem uneven because the syrup has not yet distributed throughout the pastry.
A Practical Recipe Timeline
| Stage | Typical time | Main visual cue |
| Prepare syrup | 10-15 min | Sugar fully dissolved |
| Prepare nut filling | 5-10 min | Rough, even pieces |
| Thaw pastry | According to package | Flexible, not wet |
| Loosen and butter | 15-25 min | Strands evenly coated |
| Shape | 15-30 min | Compact but not crushed rolls |
| Bake | Often around 45-60 min | Deep golden and crisp |
| Syrup | 5-10 min | Even absorption |
| Rest | Several hours | Moist interior, crisp browned strands |
These are working ranges, not guarantees. The pastry’s appearance should take priority over a timer.
How to Keep Kataifi Crisp
Crispness is determined by several stages rather than one trick.
Start With Properly Handled Pastry
If the raw strands become wet or excessively dried before baking, their final texture can suffer.
Thaw frozen pastry as directed and keep it covered during assembly.
Use Enough Butter
Fat helps the strands brown and develop their characteristic richness.
However, more is not automatically better. The goal is even distribution, not a pool of melted butter at the bottom of the pan.
Bake Until Properly Browned
Pale pastry has not developed the same structure as deeply golden pastry.
Use color as a major doneness signal.
Control the Syrup
Too much syrup can overwhelm crispness.
Pour gradually and give the pastry time to absorb it.
Troubleshooting: Why Did My Kataifi Go Wrong?
The Strands Are Too Thick
Your batter may be too thick or your dispenser opening too large.
For homemade pastry, thin the batter gradually and test a small amount before continuing.
Homemade Strands Brown Too Quickly
Lower the cooking temperature.
The initial strands should set rather than become the finished golden pastry during this stage.
The Pastry Is Difficult to Separate
It may have dried out.
Keep unused strands covered while working. Published Greek recipes specifically recommend keeping the delicate pastry under a damp towel because it dries rapidly.
The Finished Dessert Is Soggy
Possible causes include:
- insufficient initial browning
- excessive syrup
- tightly compressed pastry
- uneven butter distribution
- humid storage
Do not automatically reduce the syrup. First make sure the pastry is genuinely crisp before soaking.
The Dessert Is Greasy
Uneven buttering can leave concentrated pools of fat.
Spread the pastry gently and distribute the butter rather than pouring it all in one place.
The Nuts Taste Burnt
Extremely fine nuts can darken quickly.
Use roughly chopped nuts and keep the filling contained within the pastry rather than exposed along the edges.
Can You Make a Layered Version Instead?
Yes.
Instead of rolling individual pieces, spread buttered strands in a baking dish, add the nut mixture, and cover with another layer of pastry.
This is easier than making dozens of individual rolls and is useful for casual serving.
However, the finished structure will be different from the classic rolled presentation.
If your goal is the traditional visual appearance, make individual rolls.
If your goal is convenience, the layered approach is perfectly practical.
Can You Use Pistachios Instead of Walnuts?
Yes.
Walnuts are strongly associated with classic Greek-style kataifi, but pistachios and almonds are also used in related preparations. Established Greek recipes themselves note that pistachios and almonds can be used alongside or instead of walnuts.
Pistachios produce a greener, slightly sweeter, more aromatic filling, while walnuts provide a deeper, more earthy flavor.
A mixed filling is also an option.
What About Dubai Chocolate?
Toasted kataifi has recently become popular as an ingredient in pistachio-filled chocolate.
The basic idea is different from the syrup dessert described above.
Instead of soaking the pastry, cooks toast or fry it until crisp, chop it, and combine it with a creamy pistachio filling before enclosing the mixture in chocolate.
Associated Press reported that the Dubai chocolate trend spread internationally and inspired products far beyond the original bar.
The key lesson is that the pastry does not need syrup to be useful. Its crisp texture can be used as a structural contrast in modern confectionery.
Read more: kataifi recipe starts with one important decision.
Storage and Freezing
Storage depends on whether you are dealing with unused pastry or a completed syrup dessert.
For commercial pastry, follow the manufacturer’s refrigeration and freezing instructions.
Once baked and syruped, the dessert should be stored according to the specific recipe’s guidance and local food-safety conditions.
Do not assume that one universal number of days applies to every homemade kataifi dessert. Ingredients such as dairy fillings, cream, custard, and cheese change the storage requirements significantly.
For best texture, protect the finished pastry from humidity and excessive exposure to air.
Frequently Asked Questions
Can I make kataifi dough without a piping bag?
Yes. A squeeze bottle with a very small opening can work well. The goal is to produce continuous, fine strands rather than thick lines.
Is homemade kataifi dough difficult?
The ingredients are simple, but forming consistent strands requires practice. Batter thickness, dispenser size, and pan temperature all affect the result.
Can I use frozen kataifi pastry?
Yes. Frozen prepared pastry is one of the easiest options for home cooks. Thaw it according to the package directions and keep it covered while working.
Why does kataifi dry out so quickly?
The strands are extremely thin and have a large exposed surface area. Moisture is therefore lost quickly when the pastry is left uncovered. Keeping it covered during assembly helps preserve flexibility.
What nuts work best in a classic kataifi recipe?
Walnuts are a traditional choice for Greek-style rolled preparations. Pistachios and almonds can also be used, either alone or in combination.
How much butter should I use?
The exact amount depends on the quantity and type of pastry. A published Greek-style recipe using 450 g pastry uses 250 g of butter. For other products and preparations, follow the recipe rather than applying one universal ratio.
Should the syrup be hot or cold?
For the Greek-style recipe in this guide, cooled syrup is poured over hot pastry. Other regional desserts use different methods, so syrup temperature should be matched to the specific preparation.
Why is my baked kataifi still soft?
It may need more browning, or it may have received too much moisture. Check whether the pastry was deeply golden before syruping and whether excess syrup accumulated in the dish.
Can I substitute phyllo dough?
You can experiment with chopped phyllo, but it will not behave exactly like thread pastry. The resulting texture will be different.
Is kataifi recipe preparation suitable for beginners?
Yes, especially if you use prepared frozen pastry. Making the strands from scratch is the more advanced part; assembling a nut-filled dessert is considerably easier.
Final Takeaway
The best kataifi recipe is one that respects the pastry’s structure.
If you are making the strands yourself, focus on a smooth, very thin batter and fine threads that set without browning. If you are using frozen pastry, the priorities change: thaw it correctly, keep it covered, separate the strands gently, distribute butter evenly, and bake until genuinely golden.
For the classic Greek-style dessert, walnuts, cinnamon, butter, lemon-scented syrup, and crisp pastry create the familiar combination of toasted, nutty, sweet, and buttery flavors.
And if homemade dough feels unnecessarily ambitious, there is no reason to force it. Prepared pastry is not a shortcut that ruins the dessert-it is the practical way most home cooks can concentrate on the stages that determine the final result.